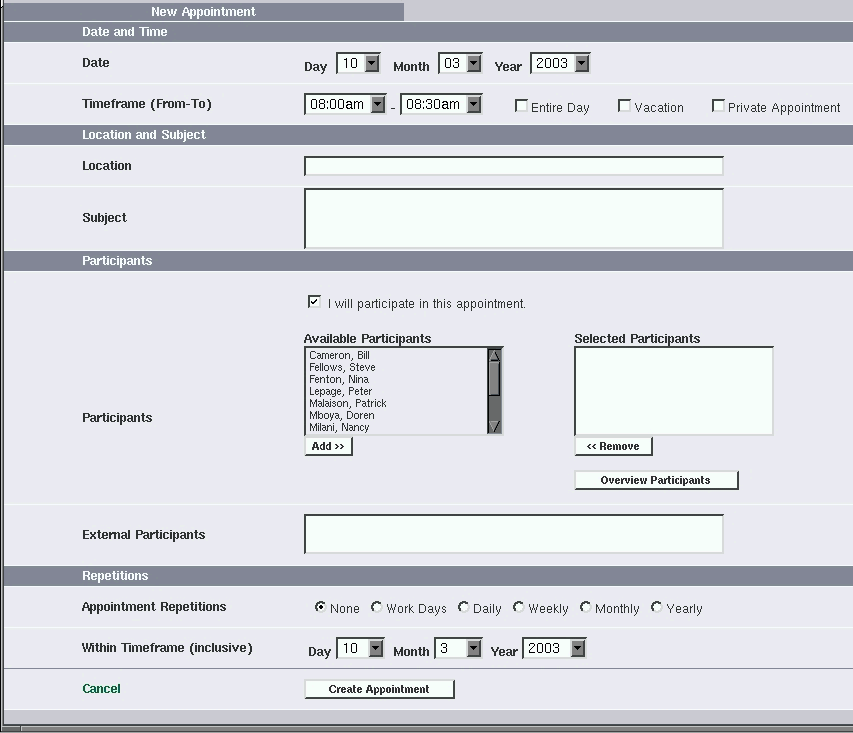
In this section, you will learn how to create appointments. Several options are available and will be covered here. First let's have a look at the New Appointment screen.
Now let's look at the different sections of the screen one by one.
In this section, you need to enter the date and time of the meeting. There is also 3 check boxes to consider in this section.
Entire Day: Check this is this is going to be an all day event.
Vacation: Check if you are going on vacation and wish to have your on-line agenda reflect this fact.
Private Appointment: If you check this box, other user will see that you are unavailable but will not be shown any details about your appointment.
In these 2 boxes, enter the location of the meeting, for example 'Board Room', or 'Doctor Doolitle's Office'. In the subject box, enter a description of the meeting for you and others to know what it is about. You could even enter the agenda there.
The first check box in this section is to indicate if you are going to attend this event or not. Next you have a list of user in your system (i.e. employees). You can select more than one person by holding the Ctrl key on your keyboard. To add them in the list on the right, click on the Add button. Use the same process to remove them from the Participants list.
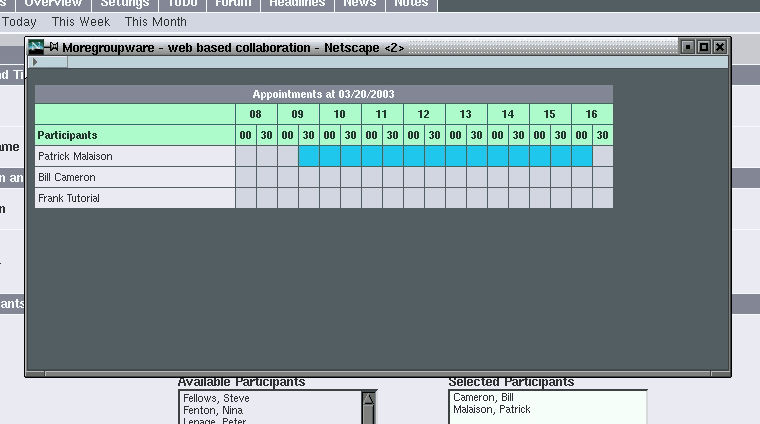
The Overview Participants button allows you to quickly assess any conflicts before trying to create the appointment. In the following example, the first person on the list has something planned from 9:30AM to 4:30PM.
The External Participant box allows you to include the names of other people involved in the event that are not part of the employee list. Remember that those people will not be automatically notified of the meeting.
This section allows you to create appointments, meetings or other entries in your calendar that are repeated at regular interval. These intervals are:
None: Default value, this indicate a one time only event
Work Days: The event will repeat every workday (Monday through Friday)
Daily: This event will repeat every day, including Saturday and Sunday.
Weekly: Indicate a weekly event, for example the Friday status meeting.
Monthly: A once a month affair, making sure your time sheet are completed by month end at the end of every month.
Yearly: A once a year event that you need to remember, a wedding anniversary or birthday for example.
The "Within Time Frame (inclusive)" date selection boxes indicate the last date that this event will occur.
The last section of this screen , to create the appointment, click on the "Create Appointment" button or on the "Cancel" button if you decide not to create the new meeting.
Successful creation: if all goes well, your appointment will be added to the system and people that are invited will see the newly created item in their own calendar and will receive an e-mail if you have this option enabled.
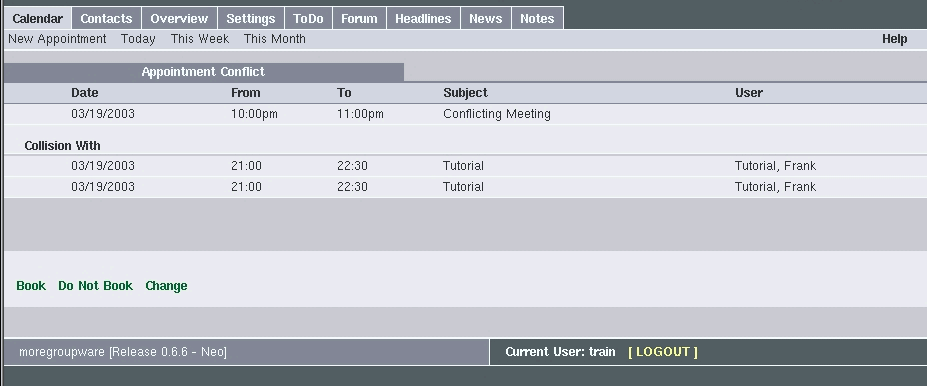
Conflicting schedule: If one of the people invited to join the meeting has a conflict in their schedule, you will be presented with the following screen:
At this point, you need to decide what the next step will be, you have three options offered to you:
Book:This option will book the meeting regardless of the conflict created. This will in fact "double" book the people having a schedule conflict. Some time it is necessary to do so, for example, you are planning a team meeting and one member as a private appointment (to the dentist maybe...) but you need to have the meeting regardless.
Do not Book: This will have the same effect as hitting cancel on the creation screen and will clear the data and remove the meeting from the schedule.
Change: This will bring you back to the previous screen and allow you to modify the meeting in order to resolve the conflict. The best way to avoid conflict is to use the "Overview Participants" function that will let you see the schedule of the people you are inviting to your meeting.


